
Brad’s Kokanee Cut Plug Rigging
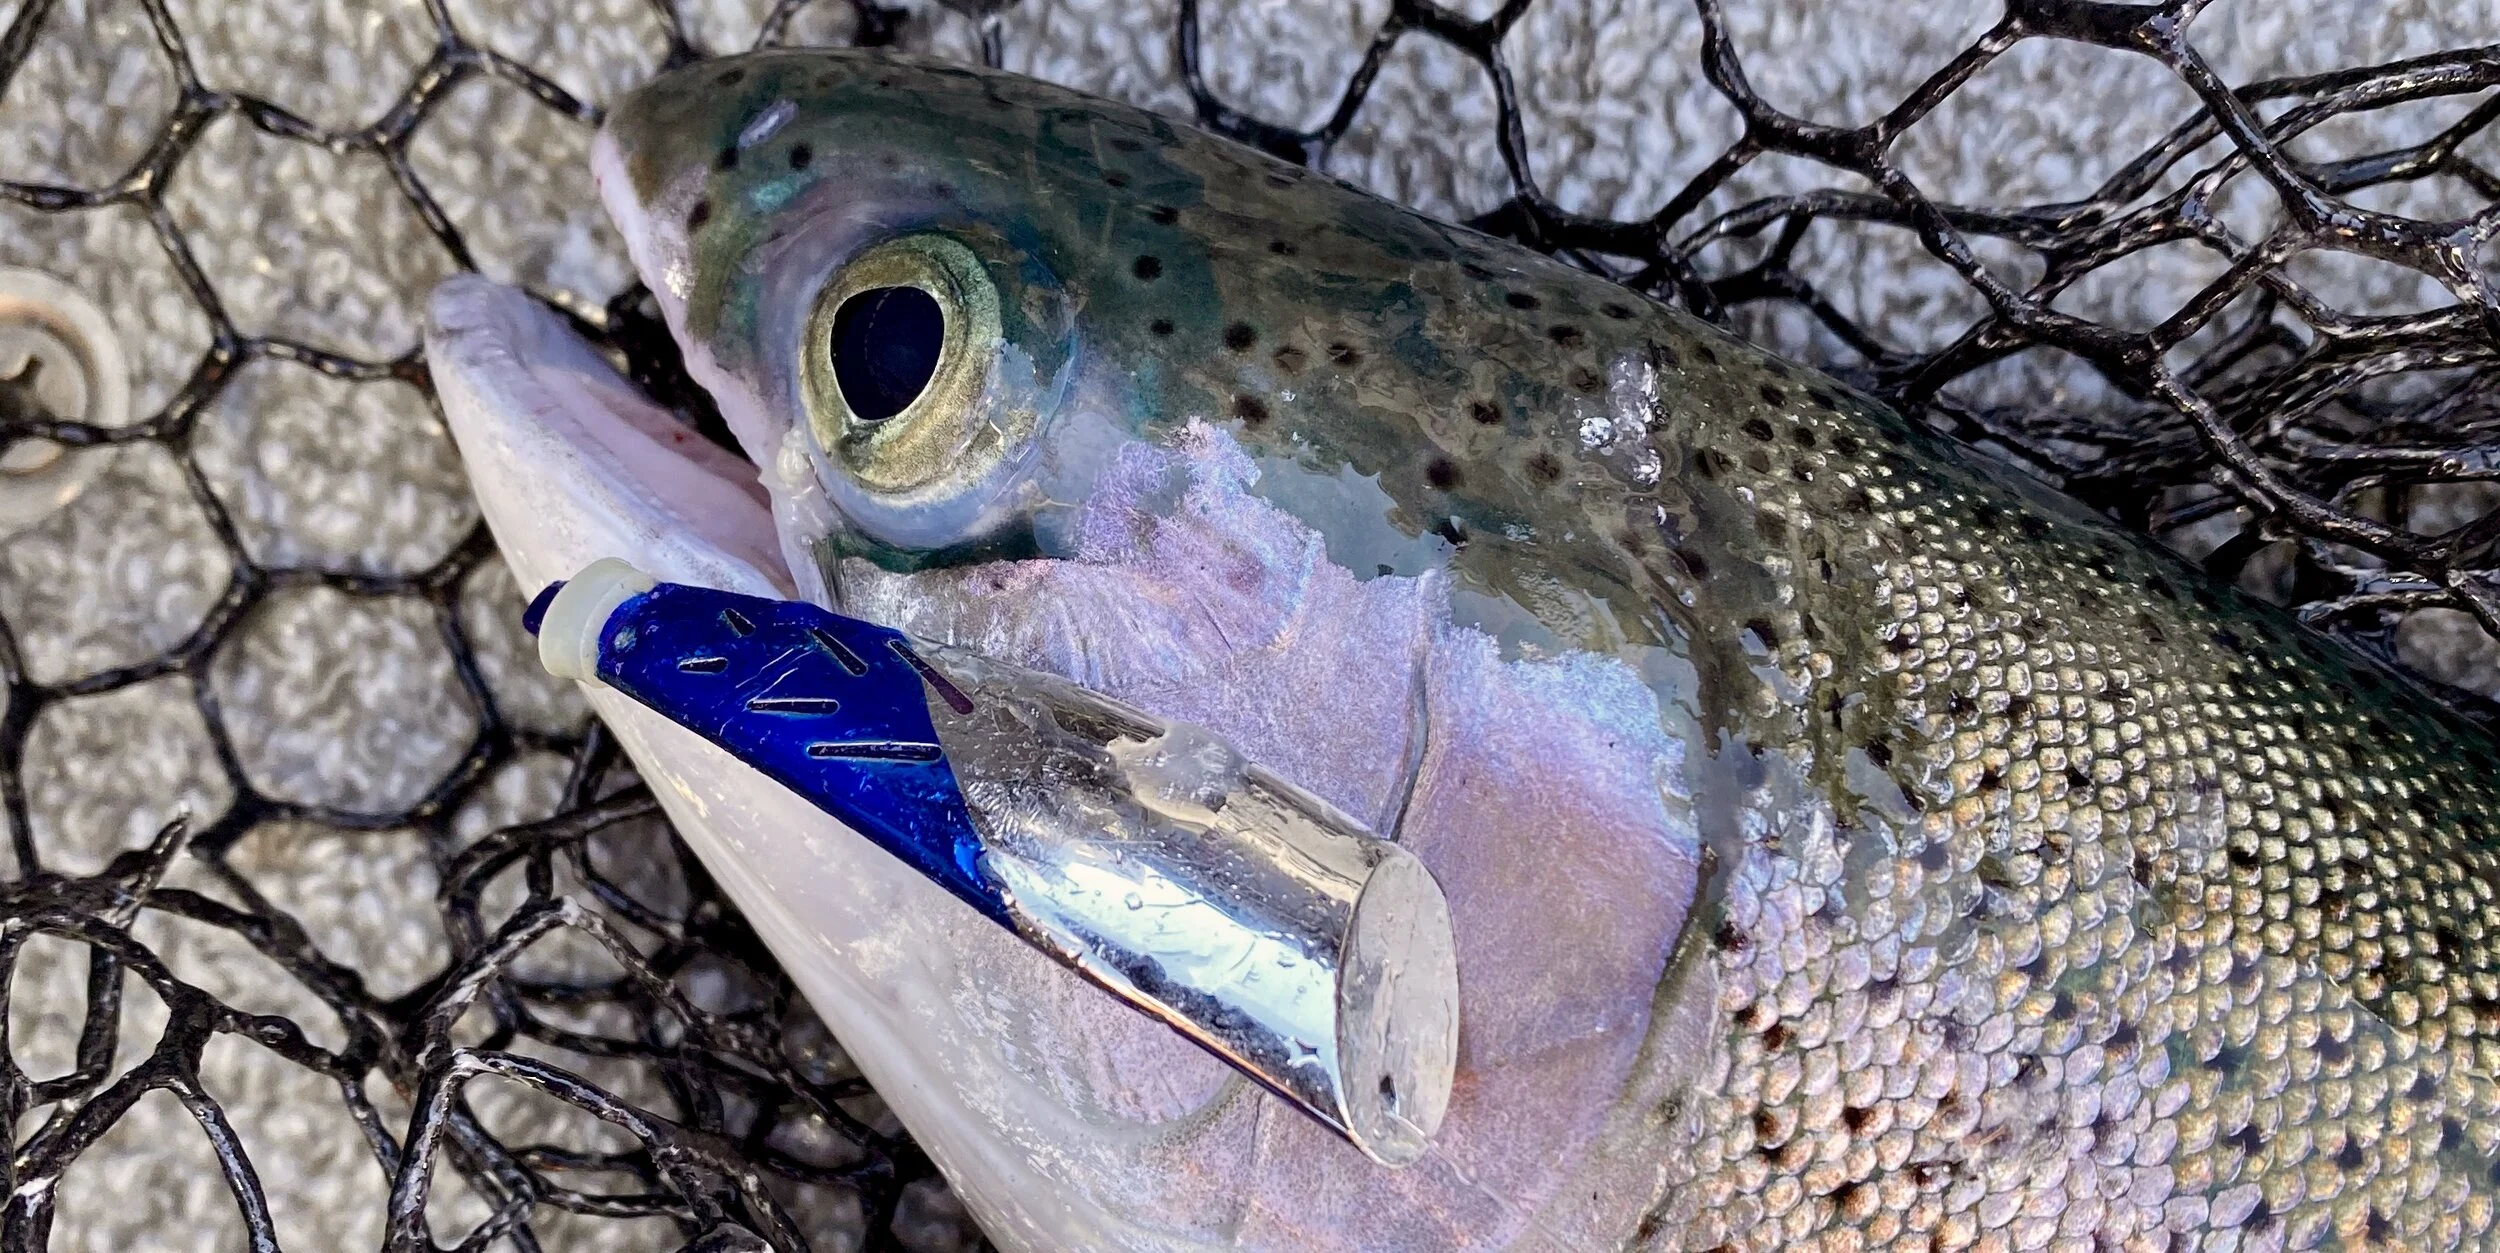
Rigging a Brad’s Kokanee Cut Plug (KCP) is easy and its deadly on my home water, Shasta Lake. Brad’s Killer Fishing Gear has a great color selection of KCP’s. Many anglers, such as myself, like to get the “Silver Bullet” KCP and create some special color patterns that are not available in tackle stores. I’ve used a particular color on Shasta Lake this year when trolling for salmon and trout using the Silver Bullet KCP. Its no wonder its caught the eye of lots of fishermen, it flat out catches fish in Shasta Lake. Recently, both Brad’s and my local tackle shop have been over run with requests for my KCP pattern, but the truth is, its not a Brad’s production color and Phil’s Propellers (tackle Shop) doesn’t carry it. I call it “Shasta Blue”, and if you want one now, you’re going to have to make it for yourself. I’ve laid out some simple steps and components below to help you make some of your own. Its a great plug and I know you’ll catch many fish with the pattern, I sure have.
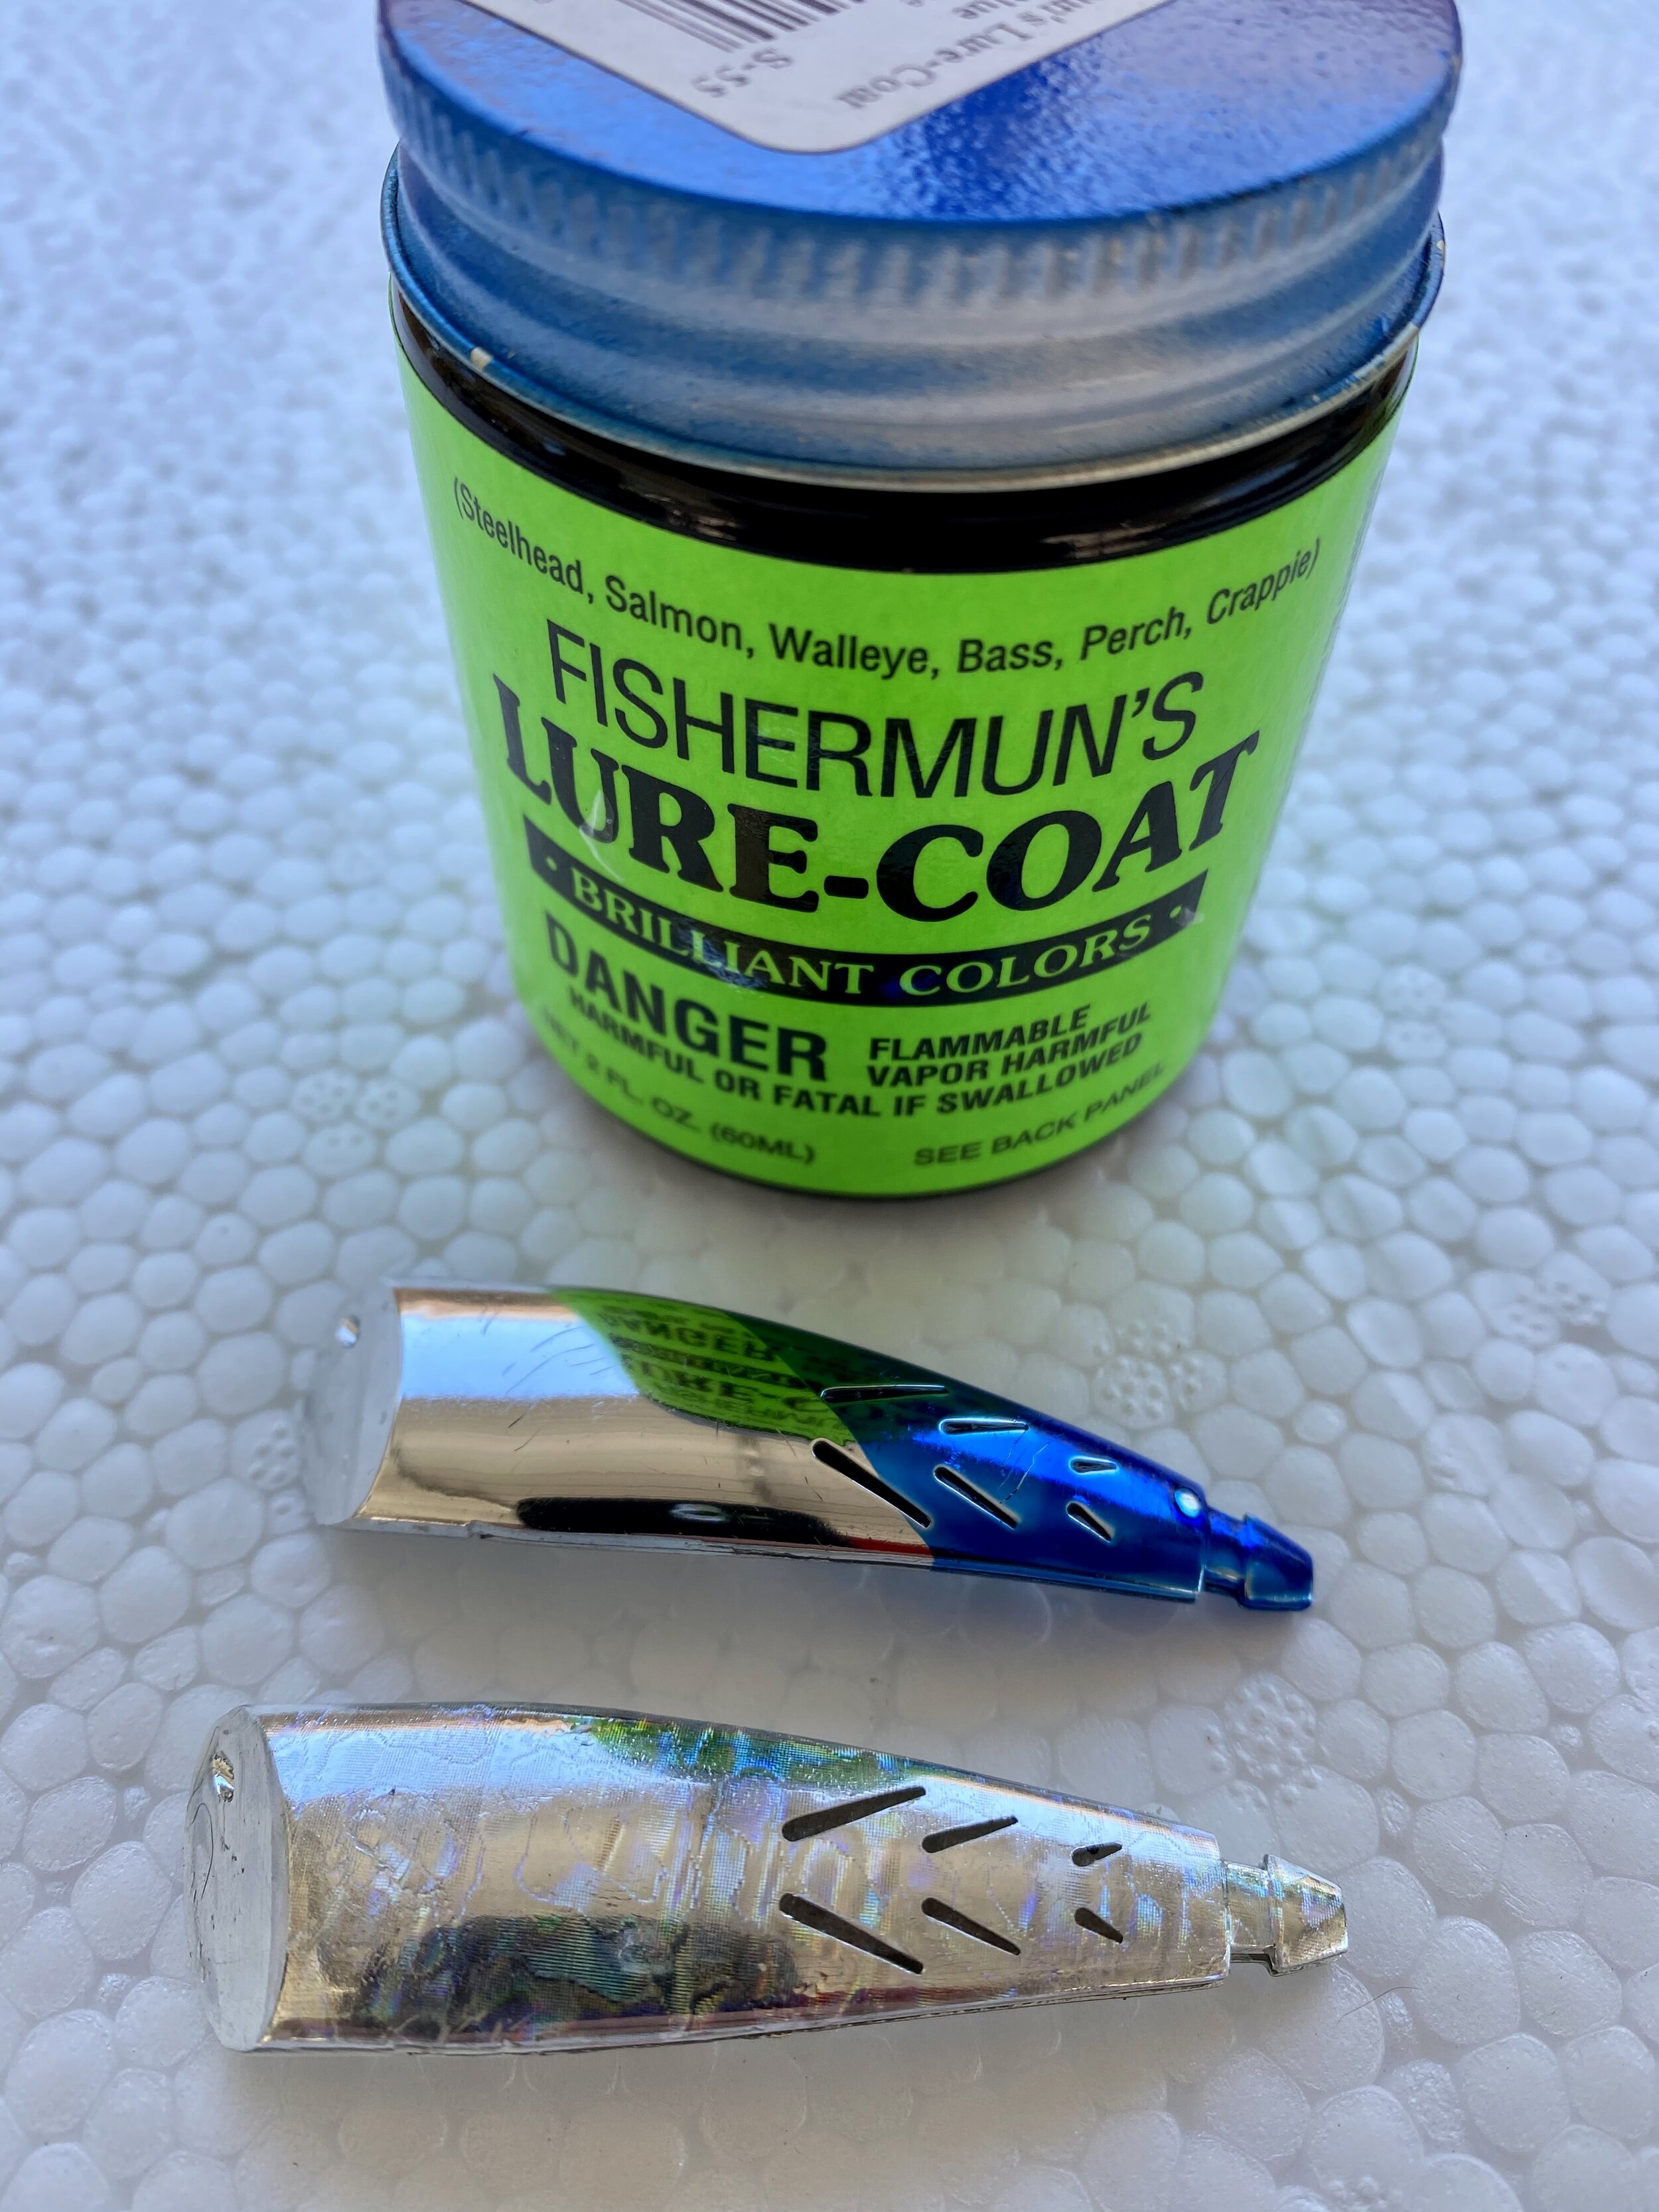
I order my Fishermun’s Lure-Coat online from Sportco up in Washington State.
Step #1
Get some transparent blue Fishermun’s Lure-Coat and some Brads Killer Fishing Gear “Silver Bullet” Kokanee Cut Plugs. Shake the Lure-Coat well, then remove the cap. Use in a well ventilated space, this stuff is potent.
Don’t forget to remove the rubber band on the tail of the KCP and after opening the scent cavity, remove the scent sponge. Save or discard the sponge, but don’t leave it in the scent cavity because it will load with paint and you’ll never get the cavity to open again.
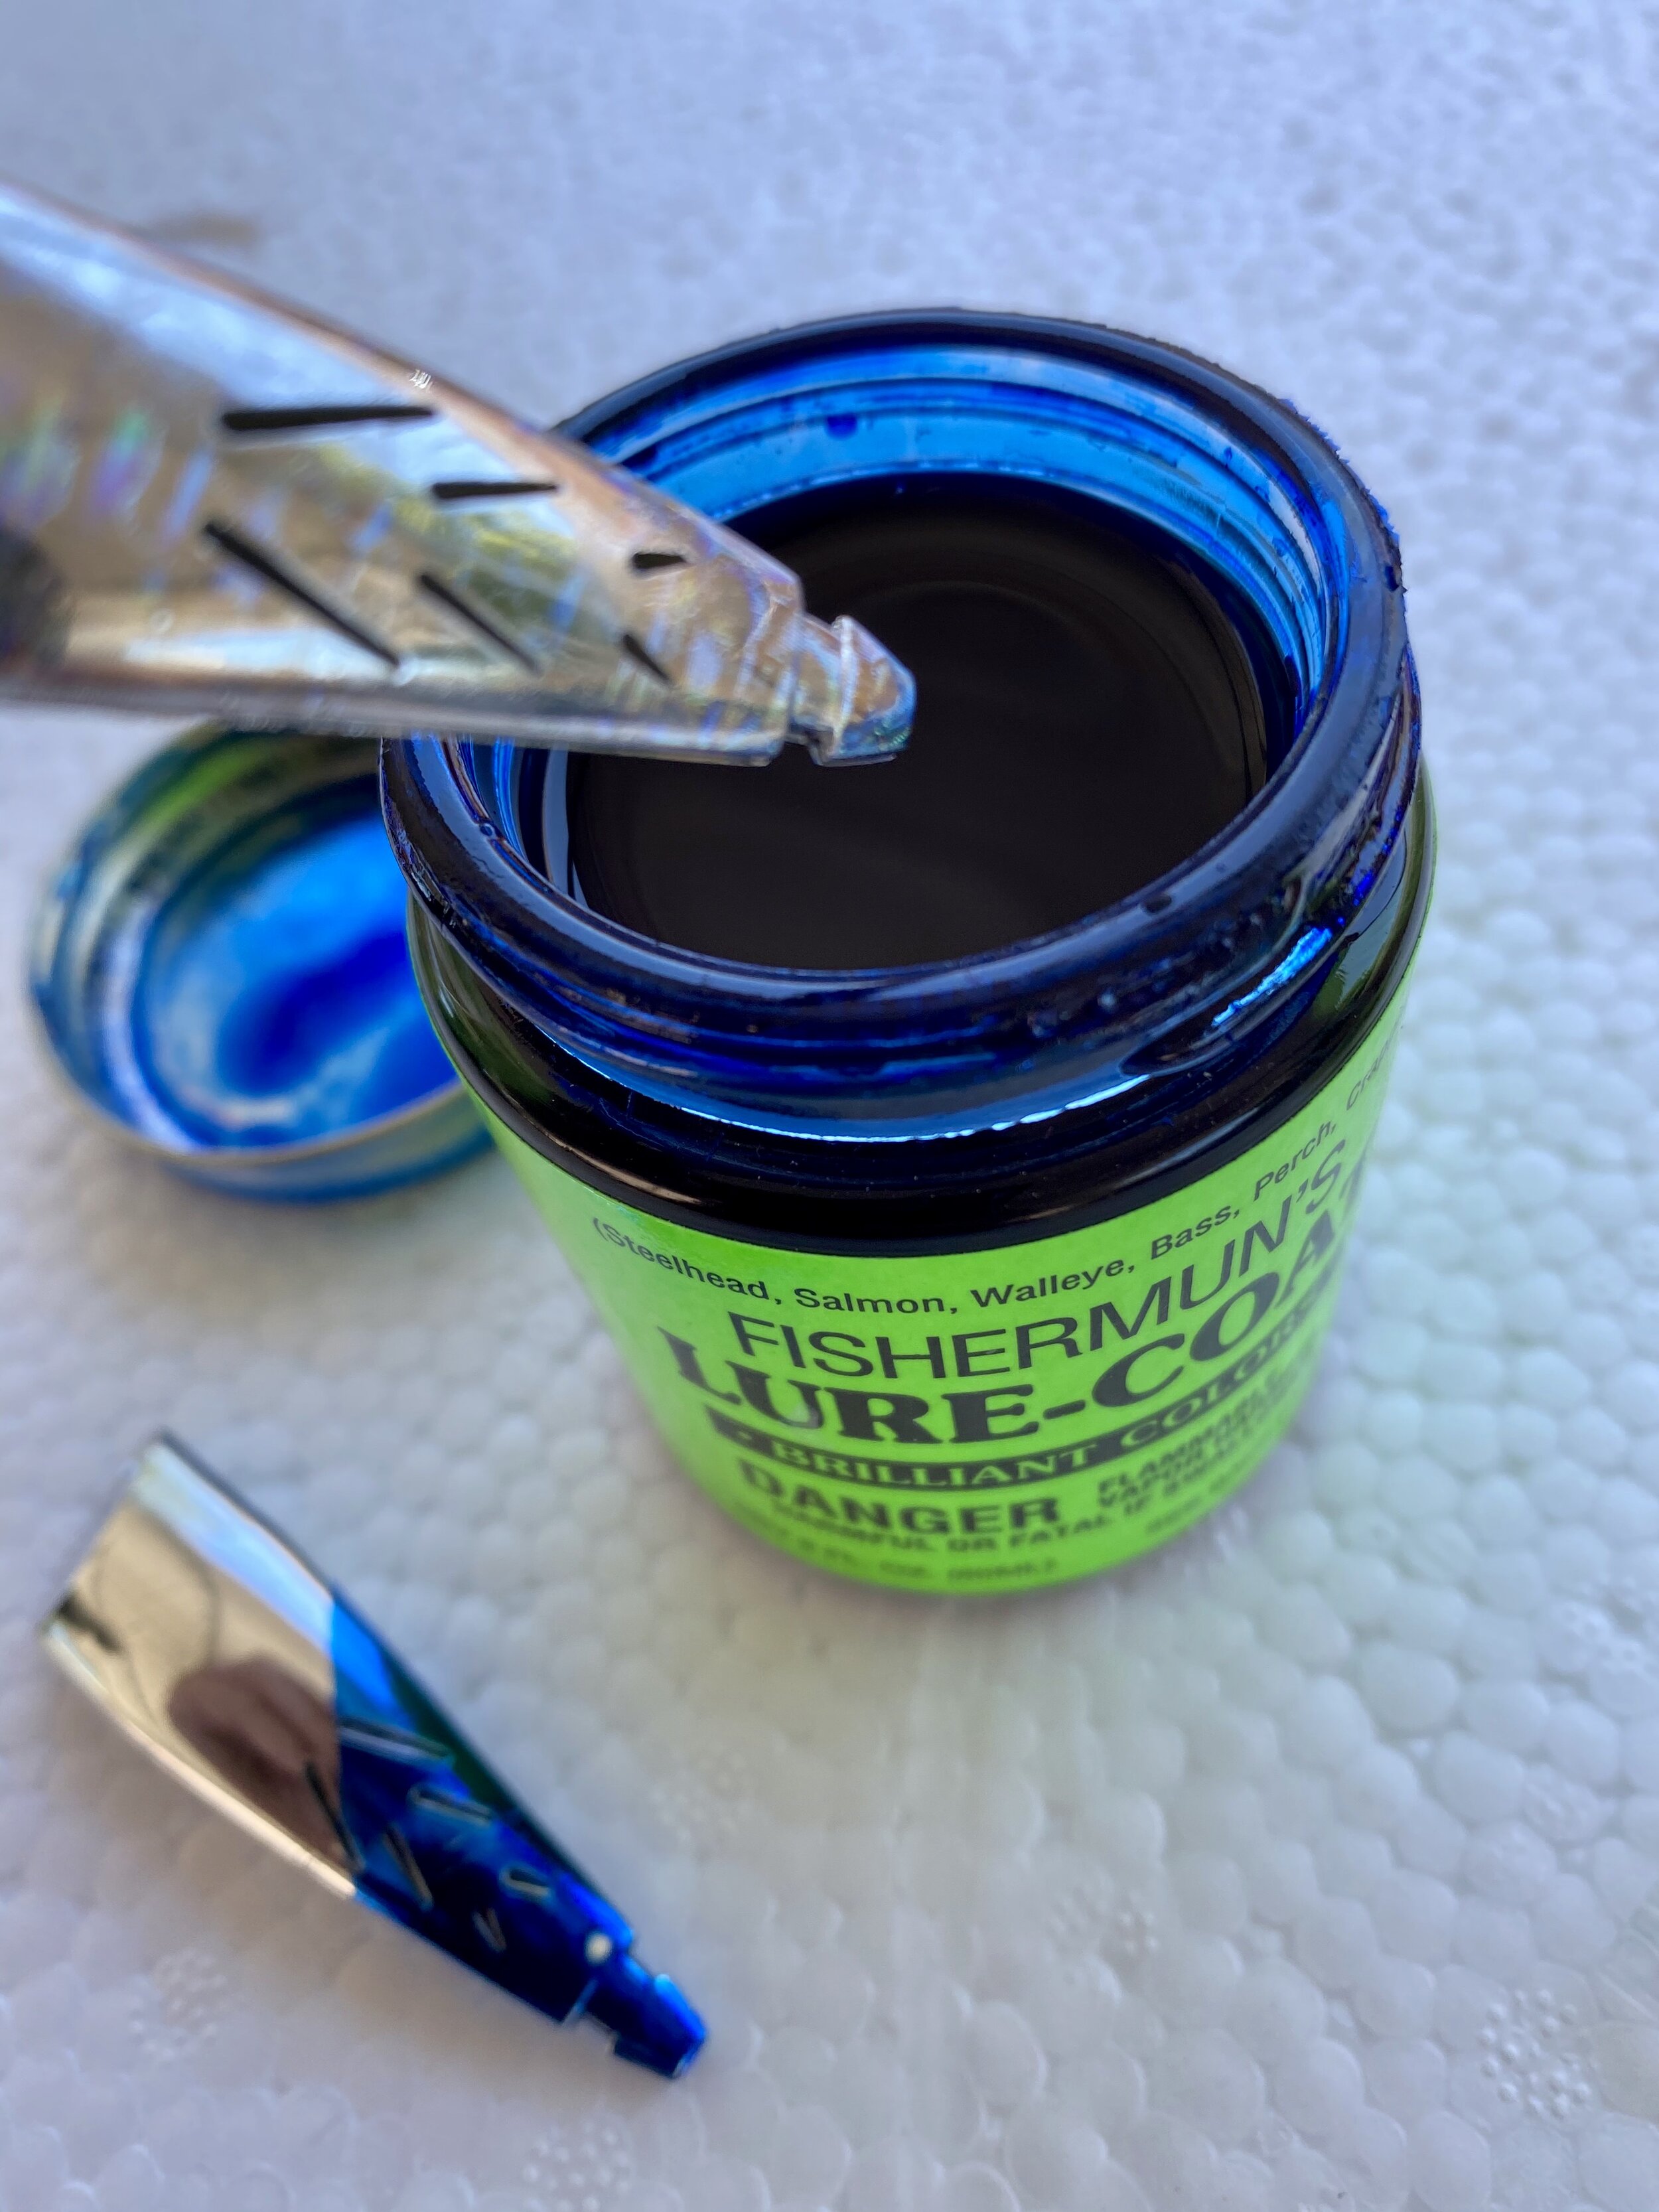
Step #2
After removing the rubber band from the tail, open the scent cavity and remove the scent sponge supplied with the KCP. Dip the KCP to the desired depth in the Lure-Coat. Creating an angled pattern will give the KCP more visual movement for the fish to see when you are trolling. After achieving the desired finish, make sure to drain any excess paint off the KCP before setting out to dry.
A completed Brad’s Killer Fishing Gear Kokanee Cut Plug ready to catch fish on Shasta lake.
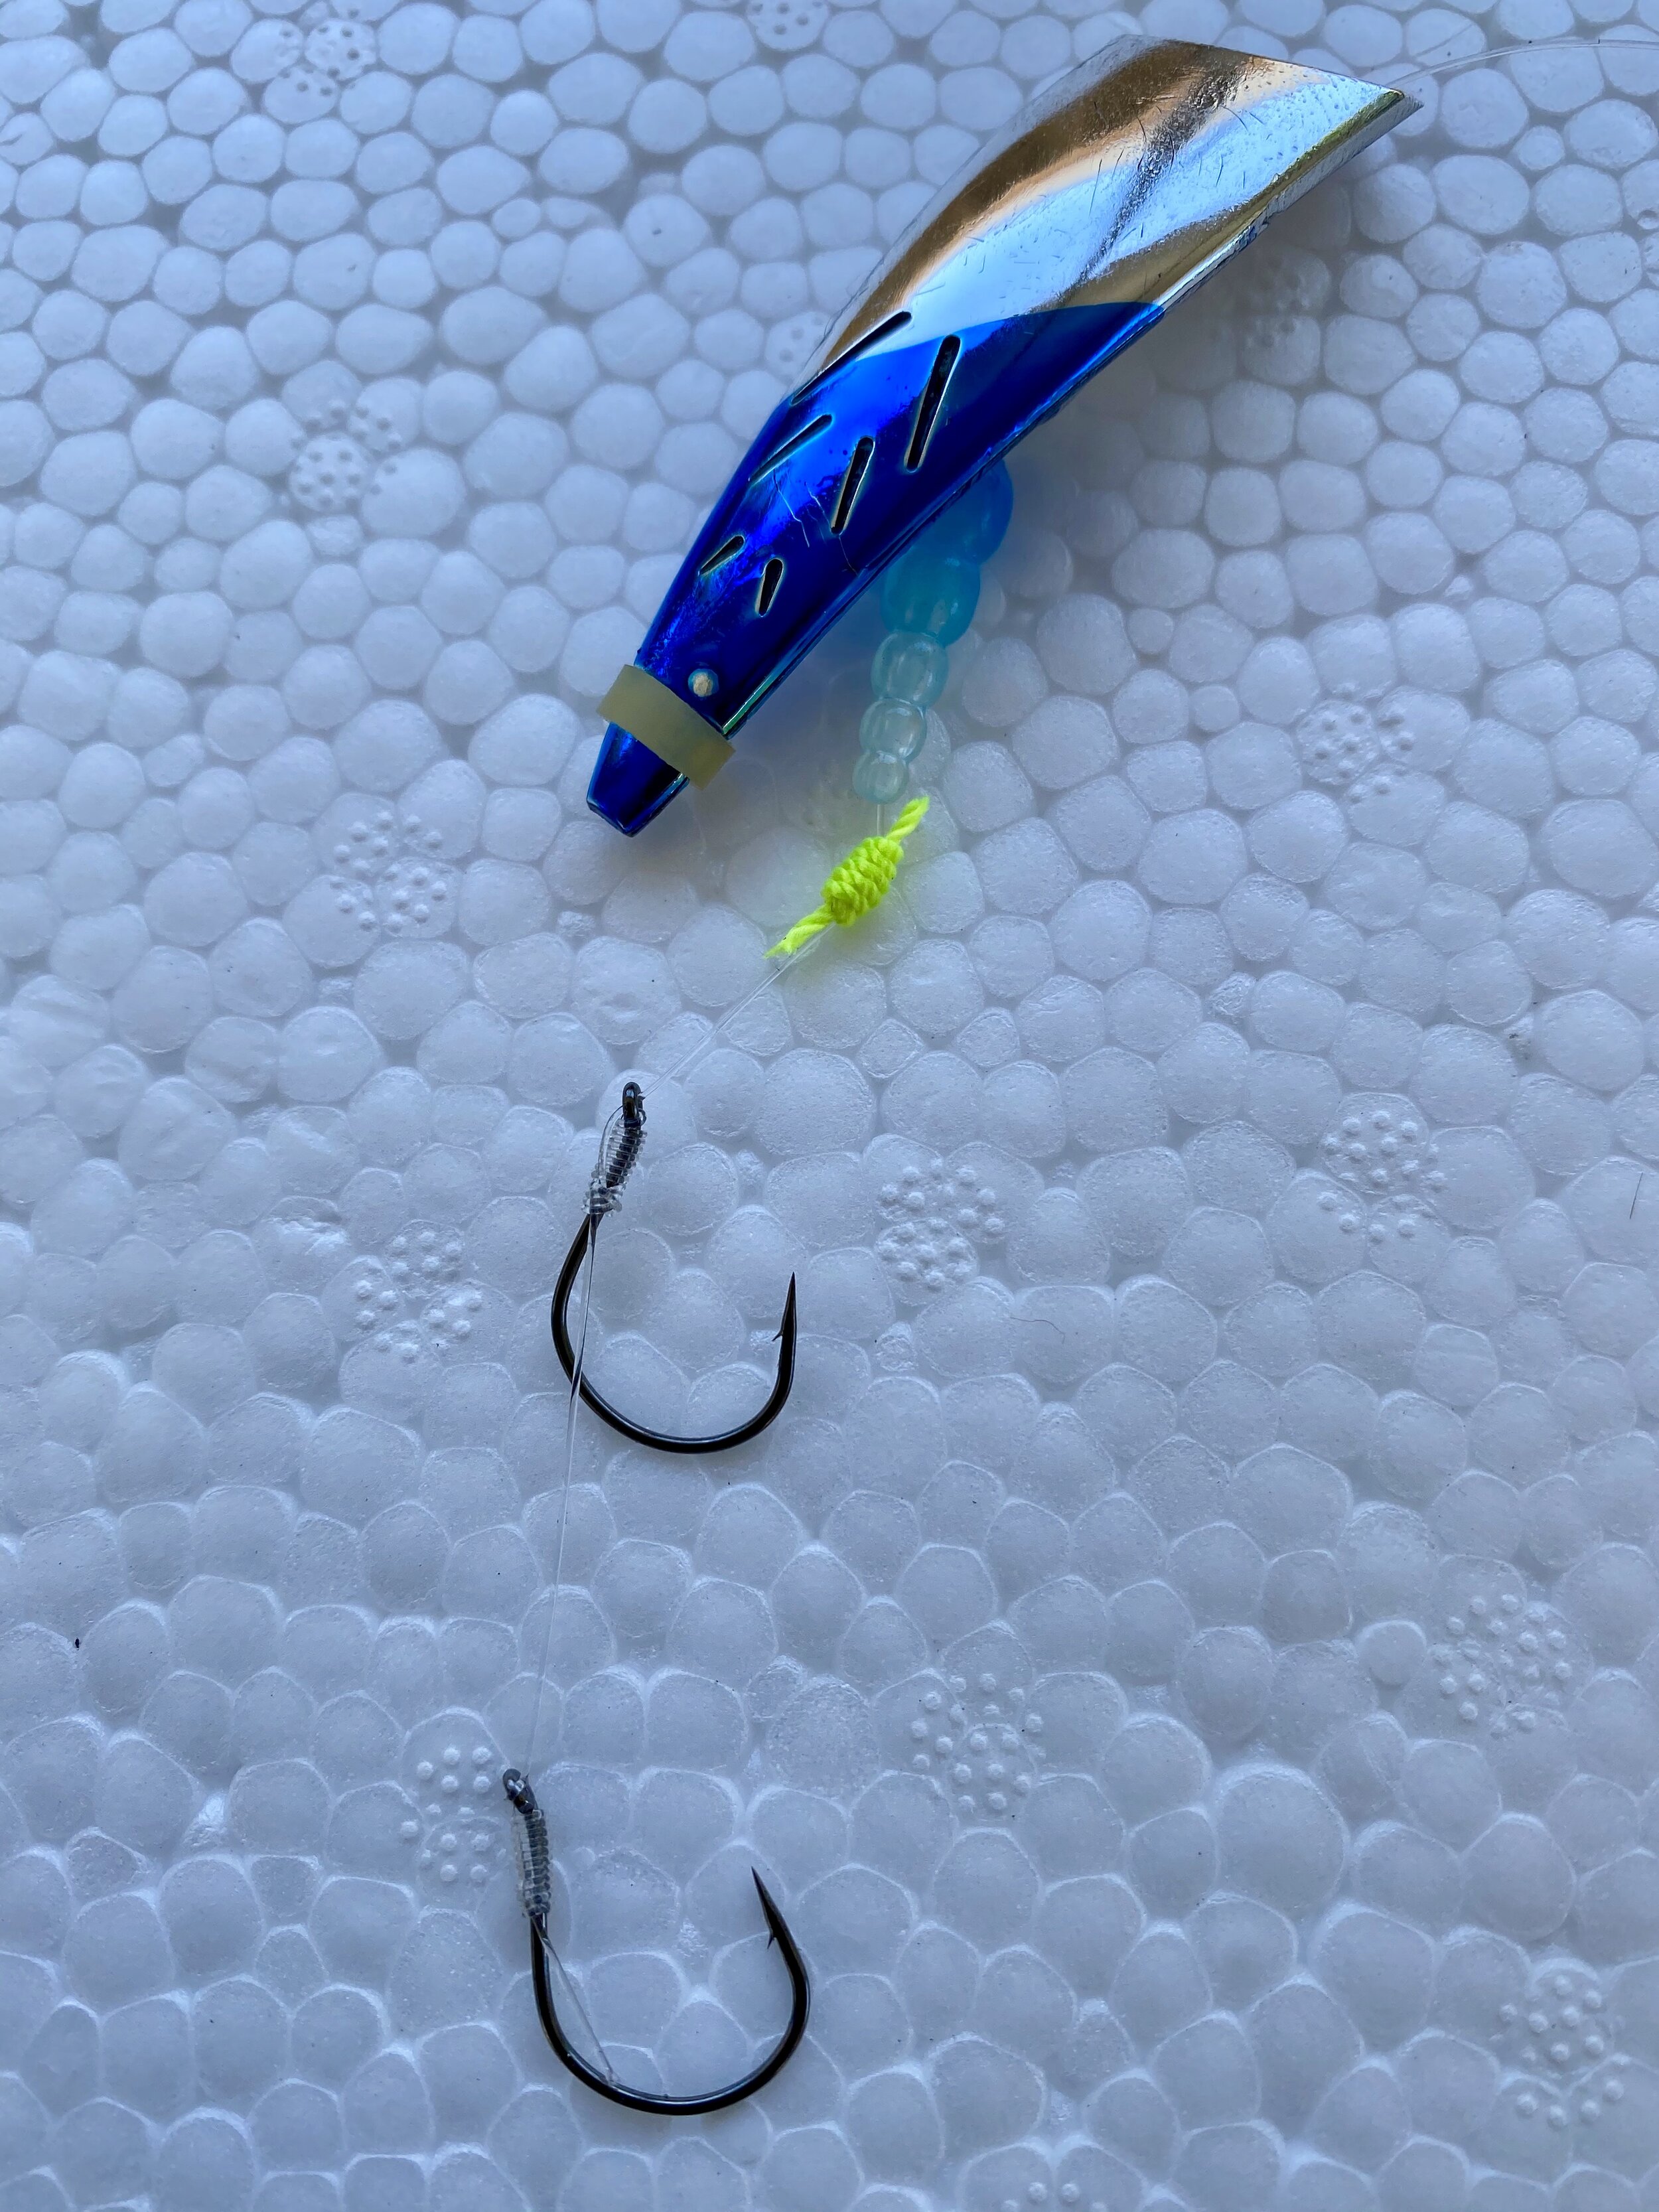
Step #3
Once your KCP paint job is dry, its time to assemble the whole rig. I use a double hook leader tied with 2 Gamakatsu #4 wide gap hooks, a bobber stop, and then slide a mack’s Lure stack bead down the leader to rest on the bobber stop. The bobber stop is essential and gives you the ability to adjust the hook set backs. I’m experiencing a pretty good hook/land ratio using this system.
Final Thoughts
I’ve run this rig off of side planers, downriggers, and brad’s Magnum Divers with great results. The KCP’s have many uses and I’ve caught fish on them a number of ways. You can run them solo, behind dodgers, behind flashers, back troll them with divers in the river, etc. Take from this short article what you like, but just so you know, I’ll be writing more and more about the use of this great fishing presentation in the weeks and months ahead.
Acknowledgements
I would like to give a special thanks to Scott Kaul and Chris Turvey from Brad’s for providing a bunch of helpful information while fishing with KCP’s . Their help has undoubtedly helped my clients catch more fish.
